Employee Leave Walk Through
What is Leave? Good question. Everybody who works occasionally has to take time off Many organizations have policies regarding the accrual and usage of paid or unpaid Leave Types that include Sick Leave, Vacation, Jury Duty, Personal Leave, Bereavement and more. These traditionally have been very difficult and time-consuming to track and maintain... until now. LeaveScheduler uses simple, no-nonsense tools to track and automatically calculate time, usage and accrual. We've provided this short walk-through of LeaveScheduler as a primer on the features and functionality. Please contact us or view the demo for more information.
Employees
Step 1. Requesting Leave

View a full size screen-shot of the Leave Request, Step 1
To begin the process of requesting leave, the employee chooses a Leave Type from the list, and selects dates from a calendar. A Supervisor can also enter a request on behalf of the employee. An alert will be displayed on the next page if a date already has a request.
Step 2. Fine Tune the Request

View a full size screen-shot of the Leave Request, Step 2
On the next page, the employee is presented with the option to deselect any of the dates, adjust the time-period in which he will be absent, or quickly choose to take the entire day off. Holidays are clearly marked, and should only be selected if the employee actually works that day.
Step 3. Review and Finalize

View a full size screen-shot of the Leave Request, Step 3
The final step of the process is to review the days and times, enter comments and set other options. The system automatically alerts the employee if he has exceeded his allotted amount of accrued time (if applicable). The example in the following screen-shot shows the employee requesting an entire day, or 7.5 hours, of Vacation time. However, there is no Vacation time available. He can then continue to submit the request and the outcome will be decided in the Approval Stage.
Supervisors and Directors
Reviewing and Processing Leave

View a full size screen-shot of the Leave Approval
When reviewing a Leave Request, a variety of options are
available. Supervisors may deny or modify individual dates, approve, deny or
delete the request, or forward the request to a Director for further review. The
Employee and any cc addresses you provide will receive E-mail notifications of your decision.
Supervisors, Directors and Administrators have different roles and permissions. Administrators and Directors may view and edit any employee’s records. Supervisors may only interact with employees that are directly assigned to them. The Supervisor is generally the person who will take care of the day-to-day review of Leave Requests.
A request can to be forwarded to a Director for further review. The Director is notified by E-mail that there is a request pending.
History and Reports

View a full size screen-shot of the Report Launcher
To put all of this information into perspective, the system comes with two print-compatible reports that show both a summary and detail of Leave Requests and Accruals. Leave records can also be easily looked up in the Employee History section. Negative times indicate time taken while positive times indicate time accrued.
Initial Setup
Step 1. Leave Type Setup

View a full size screen-shot of the Leave Setup Form
The first task of an administrator is to set up Leave Types using a
Leave Type questionaire. A Leave Type is simply any kind of paid or unpaid
leave-of-absence.
Examples of common Leave Types include Vacation, Sick Leave, Jury Duty, Personal Leave, etc.
A special type of leave called Banked Leave can also be created for situations where unused time is carried over.
Paid Leave Types such as Vacation or Sick Leave normally accrue over time. Leave Types can be set to automatically accrue monthly or yearly, based upon different criteria. A tremendous amount of time is saved by simply eliminating the need to manually calculate and track how much time an employee has accrued.
The questionnaire was designed to cover a variety of different scenarios, but in the
chance that it doesn't, we can customize Leave Types to cover just about anything that might come up. We are also happy to help with this setup.
Step 2. Employee Contract Setup

View a full size screen-shot of the Contract Setup Form
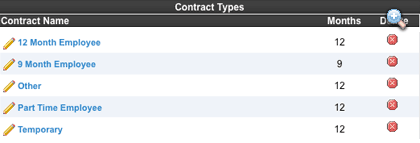
After the Leave Types are created, you will want to create Contracts which will be assigned to employees. Each Contract will have its own set of Leave Types. These are the Leave Types that the employee will be able to choose from when requesting leave. Contract and Leave Types can be mixed and matched to cover a diverse range of possibilities. For employees contracted at less than 12 months, you can specify which months are not worked when setting up the employee account.
Step 3. Input Holidays and Events

View a full size screen-shot of the Calendar of Events Form
Inputting Holidays and Events in the Event Calendar is a great way to remind your employees and associates of what's going on in your organization. Employees are alerted if they attempt to take leave on a Holiday. They will be allowed to submit a request, however, if this is incorrect, the record is highlighted for the Supervisor to correct during the approval process. Leave Types can also be set to alert if leave is requested the day before or after a holiday.
